---
title: Auto-Submit a Capacitor App to TestFlight and Google Play
description: Stop uploading IPAs and AABs by hand. Capawesome Cloud submits your Capacitor app to TestFlight and Google Play on every release tag, signed and ready.
date:
created: 2026-10-11
updated: 2026-10-11
authors:
- djabif
categories:
- Capacitor
- Cloud
- Guides
links:
- Auto-Submit to a Store: cloud/automations/auto-submit.md
- App Store Connect Destination: cloud/app-store-publishing/destinations/apple-app-store.md
- Google Play Destination: cloud/app-store-publishing/destinations/google-play-store.md
faq: true
---
# Auto-Submit a Capacitor App to TestFlight and Google Play
Submitting a Capacitor app to TestFlight and Google Play by hand means archiving in Xcode, uploading through Transporter or the Play Console, and repeating the whole thing for the second platform. Capawesome Cloud can auto-submit both apps instead: a store [destination](../../cloud/app-store-publishing/destinations/index.md) per platform holds the credentials, and an [automation](../../cloud/automations/index.md) reacts to a Git tag such as `v1.4.0` by building, signing and uploading the signed iOS and Android builds to the stores, without Xcode, a dashboard or a Mac. This guide walks through both destinations, the two release automations, the first tagged release and the errors a first setup runs into. It assumes your signing certificates are already uploaded; if not, [How to Sign & Build Capacitor Apps in the Cloud](./how-to-sign-and-build-your-capacitor-app-in-the-cloud.md) covers that step and hands off here.
**Key takeaways:**
- A destination holds the store credentials and settings such as the Play track; an automation attaches it to a build trigger.
- One automation covers one platform, so a complete release pipeline is two tag automations with the same `v*` pattern, each with its own certificate and destination.
- Automations submit without release notes, so a destination with external TestFlight beta groups fails with "No changelog provided"; submit those builds with `apps:deployments:create --release-notes` instead.
- Google Play requires the very first version of an app to be uploaded manually in the Play Console; every later version can be submitted by the automation.
- Deployments count toward build minutes, including Apple's 10 to 30 minutes of processing when the destination distributes to beta groups or submits for App Review.
## How auto-submit works
Every submission in Capawesome Cloud is a deployment of a [native build](../../cloud/native-builds/index.md) to a destination. A manual deployment picks an existing build; an automation chains the two steps, so a matching push or tag triggers a build and, once it succeeds, a deployment to the destination you attached. For Apple that means the IPA lands in TestFlight; for Google the AAB lands on the configured track. Each platform is independent: an iOS-only app needs one destination and one automation, so skip the Android subsections below, and an Android-only app skips the App Store Connect ones.
The automation's job ends at the handoff. Apple and Google still run their own processing and review, so a finished deployment means the build reached the store, not that it is live. The [Deployments](https://console.cloud.capawesome.io/apps/_/deployments){:target="_blank"} page shows each submission's status and logs, which is where you look when something fails.
## Prerequisites
Before you create destinations and automations, you need:
- **Developer accounts** for the stores you ship to. [How to Create Your Apple and Google Developer Accounts](./how-to-create-apple-developer-and-google-play-accounts.md) covers the sign-up, fees and verification steps.
- **A Git-connected app** in Capawesome Cloud through a provider integration (GitHub, GitLab, Bitbucket, Azure DevOps or Gitea). Automations register a webhook on the repository, and [Git (HTTP/S) connections](../../cloud/integrations/git.md) don't support webhooks, so automations aren't available for them.
- **Signing certificates** uploaded for each platform you ship to: a `.p12` plus provisioning profile for iOS, a keystore for Android. Store submissions require a signed build, and the automation references the certificate by name.
- **Google Play only: the first version uploaded by hand.** Google requires the initial version of an app in the Play Console before any API upload is accepted; this is a Play requirement, not a Capawesome Cloud limitation.
- **Incrementing build numbers.** App Store Connect rejects a build whose number already exists, and Google Play rejects a reused version code. Map the `CI_BUILD_NUMBER` variable to both with [auto-incrementing build numbers](../../cloud/native-builds/auto-incrementing-build-numbers.md), and every triggered build gets a fresh number.
## Create the destinations
Each store gets its own destination, created once in the Console or with the CLI and referenced by name from the automation.
### App Store Connect
The App Store Connect destination holds the credentials for the TestFlight upload. Open the [Destinations](https://console.cloud.capawesome.io/apps/_/destinations){:target="_blank"} page of your app in the Console, create one with platform `iOS` and type `App Store Connect`, and name it, for example, "TestFlight". Four fields decide what the automation can do with it:
- **Authentication method**: pick `API Key`. Beta groups, App Review submission and release notes only work with an API key; an Apple ID with an app-specific password can do nothing beyond the TestFlight upload.
- **Team ID**: from **Membership Details** in your Apple Developer account.
- **API Key File**, **Key ID** and **Issuer ID**: generated under **Users and Access → Integrations → App Store Connect API** with the **App Manager** access level. The `.p8` file downloads once, so store it somewhere safe.
- **Beta groups** and **Submit for App Review**: leave both off for now; the [App Review section](#submit-for-app-review) below explains when to turn them on.
The [App Store Connect destination](../../cloud/app-store-publishing/destinations/apple-app-store.md) docs walk through obtaining each credential, and this walkthrough shows the whole setup in the Console:
The same fields map to [`apps:destinations:create`](../../cloud/cli/commands.md#appsdestinationscreate). Every value has a flag, so the command also runs unattended from a CI job:
```bash
npx @capawesome/cli apps:destinations:create \
--app-id \
--platform ios \
--type apple-app-store-connect \
--name "TestFlight" \
--apple-team-id \
--apple-issuer-id \
--apple-api-key-id \
--apple-api-key-file ./AuthKey.p8
```
### Google Play
The Google Play destination holds the service account and the track the AAB is published to. On the same Destinations page, create one with platform `Android` and type `Google Play`, name it, for example, "Play Internal", and set:
- **Track**: `Internal`, `Alpha`, `Beta` or `Production`. Start with `Internal`; promoting a build to a higher track later happens in the Play Console.
- **Package name**: the application ID from your `build.gradle`, such as `com.example.app`.
- **Publishing format**: `AAB`. Google requires app bundles for new apps, and with R8 enabled Play deobfuscates crash reports automatically.
- **Release status**: `Completed` publishes the release on the track right away; `Draft` uploads it and waits for you to publish in the Play Console.
- **JSON Key File**: a Google Cloud service account key, invited in the Play Console under **Users and Permissions** with every permission in the **Release** section.
The [Google Play destination](../../cloud/app-store-publishing/destinations/google-play-store.md) docs list the service account steps in order, including the Google Cloud role and the Play Console invitation, and this walkthrough covers the destination end to end:
Via CLI:
```bash
npx @capawesome/cli apps:destinations:create \
--app-id \
--platform android \
--type google-play \
--name "Play Internal" \
--android-package-name com.example.app \
--google-play-track internal \
--android-build-artifact-type aab \
--android-release-status completed \
--google-service-account-key-file ./service-account.json
```
The track is passed in lowercase (`internal`, `alpha`, `beta`, `production`).
Capawesome Cloud also submits to Huawei AppGallery and Firebase App Distribution through the same destination model; [Publish a Capacitor App on Huawei AppGallery](./how-to-publish-a-capacitor-app-on-huawei-appgallery.md) covers the AppGallery Connect setup.
## Create the automations
An automation targets one platform, so a release pipeline for both stores is two automations that listen to the same tag pattern, and a single-store app needs one. Open the [Automations](https://console.cloud.capawesome.io/apps/_/automations){:target="_blank"} page, click **Create automation**, and set the trigger the same way for each:
- **Trigger type**: `Tag`. A tag marks a deliberate release; a branch trigger would submit every push.
- **Trigger patterns**: `v*`, plus `!v*-*` to skip pre-release tags such as `v1.4.0-rc.1`. Patterns starting with `!` exclude what they match.
Creating an automation registers a webhook on your repository. If your provider blocks that (insufficient permissions on the integration, a self-hosted instance), the **Setup** button on the Automations page shows the webhook URL and secret to add by hand; see [Webhooks](../../cloud/automations/webhooks.md).
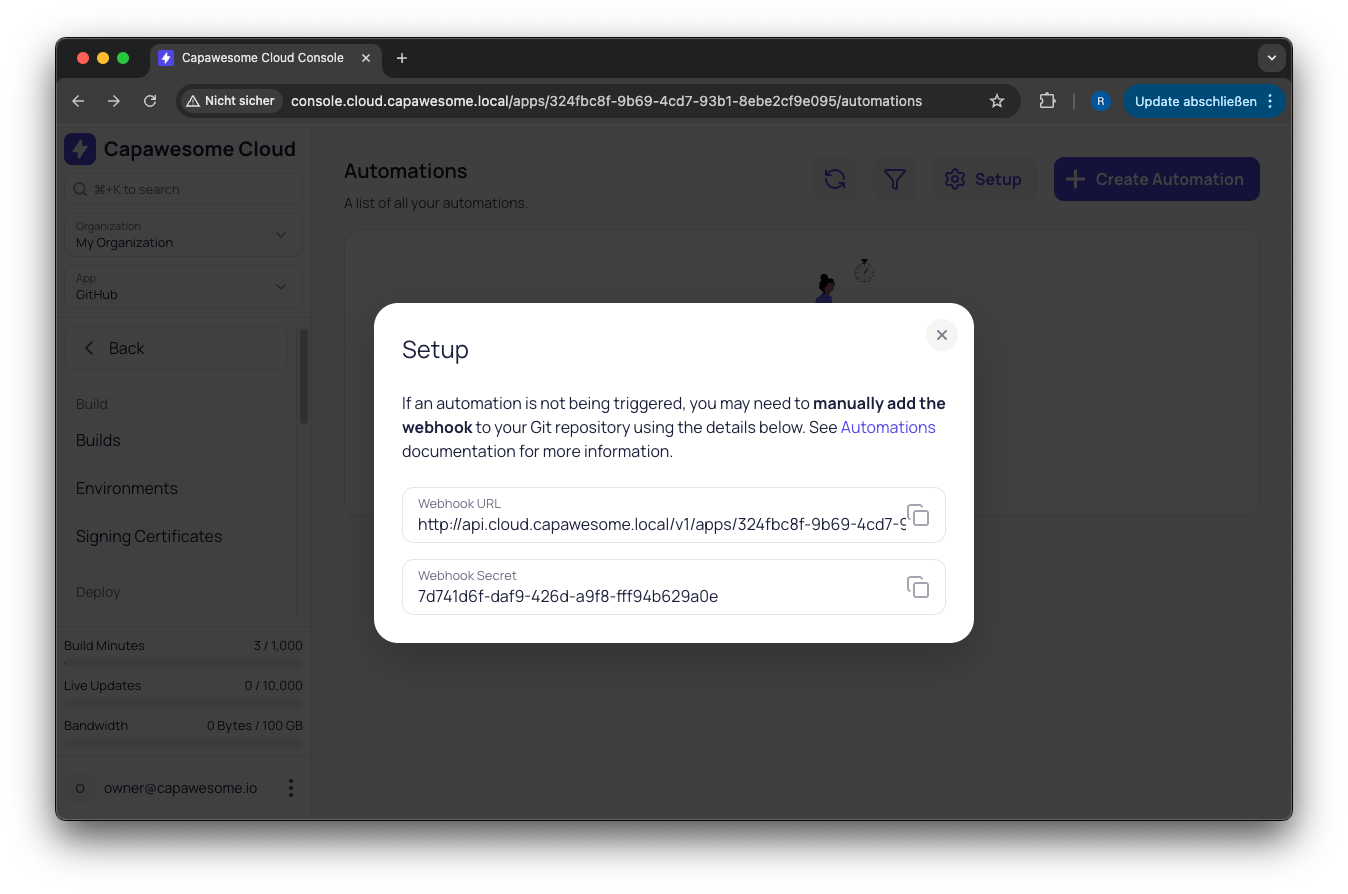
The Setup dialog holds the webhook URL and secret for a manual registration
Environments, native configurations and a pinned build stack are further per-automation settings; [Attach Build Settings](../../cloud/automations/attach-build-settings.md) lists every field.
### iOS automation
The iOS automation sets **Platform** to `iOS`, **Build type** to `App Store`, **Signing certificate** to the iOS certificate and **Store destination** to the App Store Connect destination. Via CLI, with the certificate and destination referenced by name:
```bash
npx @capawesome/cli apps:automations:create \
--app-id \
--name "Release iOS" \
--platform ios \
--trigger-type tag \
--trigger-pattern "v*" \
--trigger-pattern "!v*-*" \
--type app-store \
--certificate "Production iOS Certificate" \
--destination "TestFlight"
```
### Android automation
The Android automation sets **Platform** to `Android`, **Build type** to `Release`, **Signing certificate** to the Android keystore and **Store destination** to the Google Play destination:
```bash
npx @capawesome/cli apps:automations:create \
--app-id \
--name "Release Android" \
--platform android \
--trigger-type tag \
--trigger-pattern "v*" \
--trigger-pattern "!v*-*" \
--type release \
--certificate "Production Android Key" \
--destination "Play Internal"
```
## Ship a release
Tag the commit you want to release and push the tag:
```bash
git tag v1.4.0
git push origin v1.4.0
```
Three things should happen within a minute. The **Last triggered** timestamp of both automations updates on the Automations page, two builds appear on the [Builds](https://console.cloud.capawesome.io/apps/_/builds){:target="_blank"} page, and once each build succeeds a deployment appears on the Deployments page. From the terminal:
```bash
npx @capawesome/cli apps:deployments:list --app-id
npx @capawesome/cli apps:deployments:logs --app-id
```
Add `--json` to `apps:deployments:get` or `apps:deployments:list` for the related job's status and timing, which is the format to parse from an existing CI pipeline. If nothing triggered, the webhook didn't reach Capawesome Cloud; the Setup dialog on the Automations page is the first place to check.
After the handoff, the iOS build shows up in TestFlight once App Store Connect finishes processing it, typically 10 to 30 minutes, and internal groups with automatic distribution get it right away. The Android build is on the chosen track in the Play Console, published if the release status is `Completed`, waiting as a draft otherwise.
## Submit for App Review
On iOS, an App Store Connect destination with an API key can go beyond the TestFlight upload; Android has no equivalent, since the Play track and release status already decide where the build lands. Two checkboxes on the destination control it:
- **Submit for App Review** creates the App Store version matching the build's version, attaches the build once Apple has processed it, and submits it. **Release type** decides whether you release the approved version yourself (`Manual`) or Apple does it after approval. **Cancel pending submission** withdraws a version still waiting for review before submitting the new build.
- **Beta groups** distribute the build to up to 20 external TestFlight groups and submit it for Beta App Review.
Both require `ITSAppUsesNonExemptEncryption` in your app's `Info.plist`; without it the deployment fails before the upload, because Capawesome Cloud never answers Apple's export compliance question for you. The [Submit for App Review](../../cloud/app-store-publishing/submit-for-app-review.md) docs list the other prerequisites, such as the Test Information in App Store Connect and a complete store listing.
Automations have one limitation here: they can't carry [release notes](../../cloud/app-store-publishing/release-notes.md). For App Review that only means **What's New** stays as it is in App Store Connect. For beta groups it's a hard stop, since TestFlight's **What to Test** is mandatory for external testers and the deployment fails with "No changelog provided". Keep beta groups off the destination your automation uses, and submit builds for external testers from the CLI, where `apps:deployments:create --release-notes "..."` provides the text. The CLI flag also sets **What's New** on an App Review submission.
## Common failures
The Deployments page shows Apple's or Google's error in the logs, and the **Ask AI** button (or `apps:deployments:failure-summary` from the CLI) turns that output into a cause and a fix.
- **Nothing triggered**: the tag didn't match the pattern (pre-release tags are excluded by `!v*-*`), the head commit contained `[skip ci]`, or the webhook never registered.
- **Signing failed before the submission started**: an expired distribution certificate or a provisioning profile that no longer matches the bundle ID. [CI/CD for Capacitor: Common Pitfalls](./ci-cd-for-capacitor-common-pitfalls.md) walks through diagnosing both.
- **"No changelog provided"** on a TestFlight deployment: the destination has beta groups and the automation sent no release notes. Remove the groups or submit with the CLI.
- **Build not in TestFlight** after a successful deployment: Apple is still processing, the build number wasn't incremented, or the `Info.plist` lacks a privacy description. Check the Apple account's mail for a processing error.
- **Google Play rejected the upload**: the first version of the app was never uploaded manually, the service account lacks the Release permissions, or the package name, track or release status on the destination doesn't match the app.
The [App Store Publishing troubleshooting](../../cloud/app-store-publishing/troubleshooting.md) page keeps the full list, including the export compliance and first-version errors.
## Two more patterns
The two tag automations above put every release in TestFlight and on the Internal track, and promotion to production stays a step you take in App Store Connect and the Play Console. The same building blocks cover two other workflows.
**Production with a human gate** moves the gate into the stores. Point the Android destination at the `Production` track with release status `Draft`, so each tag uploads a production release that someone publishes in the Play Console. On iOS, turn on **Submit for App Review** with release type `Manual`: Apple reviews every tagged build and you release the approved version yourself. Prepare **What's New** in App Store Connect before tagging, since the automation can't write it.
**Nightly internal builds** use a branch trigger instead of a tag: trigger type `Branch`, pattern `main`, same certificates and destinations. Every push to `main` ends up on the `Internal` track and in TestFlight's internal groups. Two things to watch: each push spends build minutes plus a deployment, and `[skip ci]` in the head commit message is how documentation-only changes stay out of the stores. A [commit message pattern](../../cloud/automations/filter-by-commit-message.md) on the automation filters the other way, triggering only commits that match.
## Release from the cloud
Every build and submission in this guide ran on Capawesome Cloud's build machines, so the iOS release never needed a Mac, and both store credentials stay encrypted in the destinations instead of on a developer's disk. The 14-day free trial includes native builds, store submissions and Live Updates.
[Try Capawesome Cloud Free](https://capawesome.io){ .md-button .md-button--primary }
## FAQ
### Can one automation submit to both TestFlight and Google Play?
No. An automation builds for a single platform, so a release needs one iOS automation with the App Store Connect destination and one Android automation with the Google Play destination. Give both the same tag pattern, and one `git push origin v1.4.0` triggers both.
### Can I auto-submit to TestFlight only, or to Google Play only?
Yes. Destinations and automations are per platform, so an iOS-only app needs one App Store Connect destination and one iOS tag automation, and an Android-only app one Google Play destination and one Android automation. Nothing in the setup depends on the other platform, and adding it later means creating the second pair without touching the first.
### Can an automated submission include release notes?
No, not yet. Automations submit without release notes, so **What to Test** and **What's New** keep their current values in the stores. To ship release notes, submit the finished build with `npx @capawesome/cli apps:deployments:create --release-notes "..."`, which accepts translations through `--release-notes-locale` or a JSON file. A destination with external TestFlight beta groups can't be used by an automation at all, because those groups require the notes.
### Do I need a Mac to submit to TestFlight this way?
No. The build runs on a macOS machine in Capawesome Cloud and the upload goes straight from there to App Store Connect, so you upload to the App Store without Xcode or Transporter, and a Windows or Linux laptop with Git access is enough. [How to Build and Deploy iOS Apps Without Owning a Mac](./how-to-build-and-deploy-ios-apps-without-a-mac.md) covers the rest of a Mac-free workflow, including generating the `.p12` certificate in the browser.
### Why does App Store Connect reject my automated build?
Usually because the build number already exists. Each upload needs a higher build number than any build of that version, and a tag automation that builds the same commit twice would reuse it. The `CI_BUILD_NUMBER` mapping from the [prerequisites](#prerequisites) gives every build a unique number.
### Can I submit from GitHub Actions or GitLab CI instead?
Yes. The automation is optional; the destination works from any pipeline that can run the Capawesome CLI with a token. A CI job triggers a signed build with `apps:builds:create --certificate ""` and submits it with `apps:deployments:create --destination "" --detached`, which returns as soon as the deployment is created. That path also accepts `--release-notes`, so it is the way to submit to a destination with beta groups from CI.
### Do store submissions count toward build minutes?
Yes. A deployment job is billed like a build, and when the destination distributes to beta groups or submits for App Review, the job waits for Apple to process the build, which adds 10 to 30 minutes per iOS release. A plain TestFlight upload finishes right after the upload and costs a fraction of that.
## Conclusion
If your pipeline already runs on GitHub Actions or GitLab CI, [Capacitor CI/CD in 2026: Why Specialization Wins](./ci-cd-for-capacitor-apps.md) weighs when to move the build and submission steps to a Capacitor-specific platform. Questions about a specific destination setup are welcome on the [Capawesome Discord server](https://discord.gg/VCXxSVjefW){:target="_blank"}, and the [Capawesome newsletter](https://capawesome.io/newsletter/){:target="_blank"} announces new Cloud features such as release notes for automations when they ship.
