Install an IPA on an iOS Device
With Capawesome Cloud, you can install an IPA directly on a physical iOS device — similar to how it works in platforms like Loadly or Diawi. All you need to do is create a signed build and scan a QR code or tap a download link. For Development and Ad Hoc builds, you also need to register your device in the Apple Developer account first.
This guide walks you through the entire process using Capawesome Cloud, Capacitor, and your iOS device.
Register the Device
For Development and Ad Hoc builds, your iOS device must be registered in the Apple Developer account and assigned to the provisioning profile used to sign the app. Enterprise builds do not require device registration and can be installed on any device.
Enterprise Builds
If you are using an Enterprise build type, you can skip this section and proceed directly to Create the Build.
Find the Device UDID
Every iOS device has a unique identifier (UDID) that is required for device registration. You can find your device's UDID using the iOS UDID Finder tool.
Register the Device in Apple Developer Portal
Once you have the UDID, register the device in the Apple Developer portal:
- Sign in to Certificates, Identifiers & Profiles.
- Click Devices in the sidebar.
- Click the add button (+) in the top left.
- Select the platform (e.g. iOS).
- Enter a device name (e.g. "Robin's iPhone 16").
- Enter the UDID.
- Click Continue, then Register.
Device Limit
Apple limits the number of registered devices to 100 per product family (iPhone, iPad, etc.) per membership year. Disabling a device does not free up a slot.
Update the Provisioning Profile
If the device is not yet included in your provisioning profile, you need to update it:
- Sign in to Certificates, Identifiers & Profiles.
- Click Profiles in the sidebar.
- Select the provisioning profile you want to update.
- Click Edit.
- In the Devices step, check the newly registered device.
- Click Save to regenerate the profile.
- Download the updated provisioning profile.
- Re-upload the updated profile to Capawesome Cloud.
Old Provisioning Profile
Builds signed with the old provisioning profile will not include the new device. You must re-upload the updated profile and create a new build.
Create the Build
To install an IPA on a physical device, you need a signed build with the correct build type and signing certificate.
- Navigate to the Builds page of your app in Capawesome Cloud.
- Click on the Build from Git button.
- Select the Git reference (branch, tag, or commit) you want to build from.
- Select iOS as the platform.
- Select Development, Ad Hoc, or Enterprise as the build type.
- Select a signing certificate that matches the chosen build type and has a provisioning profile with the device registered:
- For Development builds, use a Development certificate.
- For Ad Hoc builds, use a Distribution certificate (typically configured as Production in Capawesome Cloud) with an Ad Hoc provisioning profile.
- For Enterprise builds, use an Enterprise distribution certificate (typically configured as Production in Capawesome Cloud) with an enterprise provisioning profile.
- Click on Build to start the build process.
Wait for the build to complete. You can monitor the build progress on the build details page.
For more detailed instructions on creating builds and uploading signing certificates, refer to the Getting Started guide and the iOS Signing Certificates documentation.
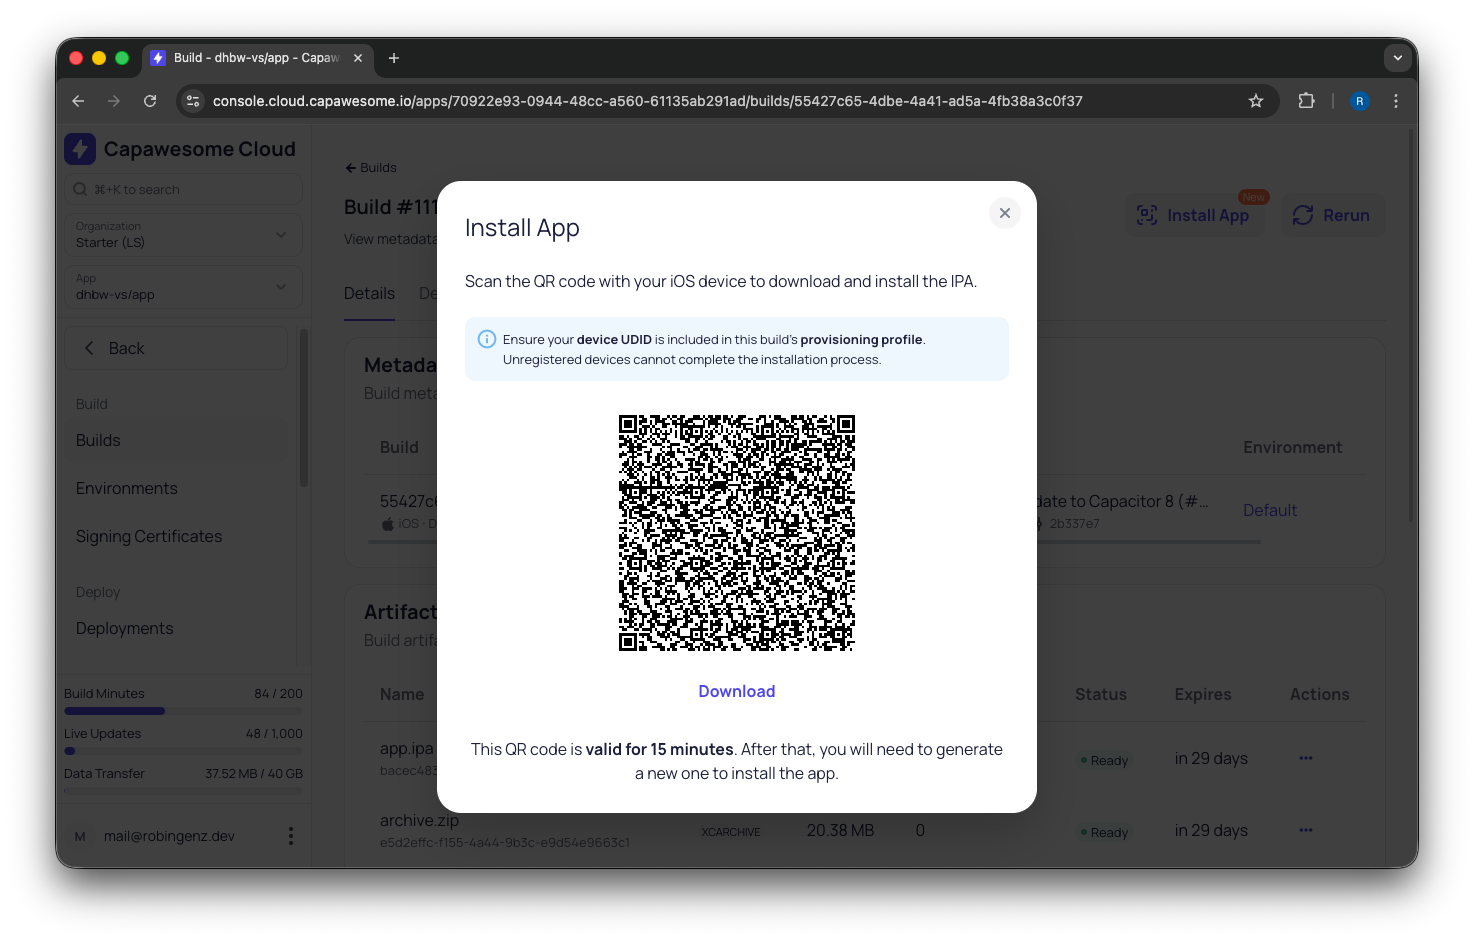
Install the App
Once the build is complete, you can install the IPA on your device:
- Open the build details page in Capawesome Cloud.
- Click the Install App button.
- Scan the QR code with your iOS device or tap the Download button if you are already on your device.
- The app will be installed on your device.